How to Deploy a Jekyll Site Using GitHub Pages
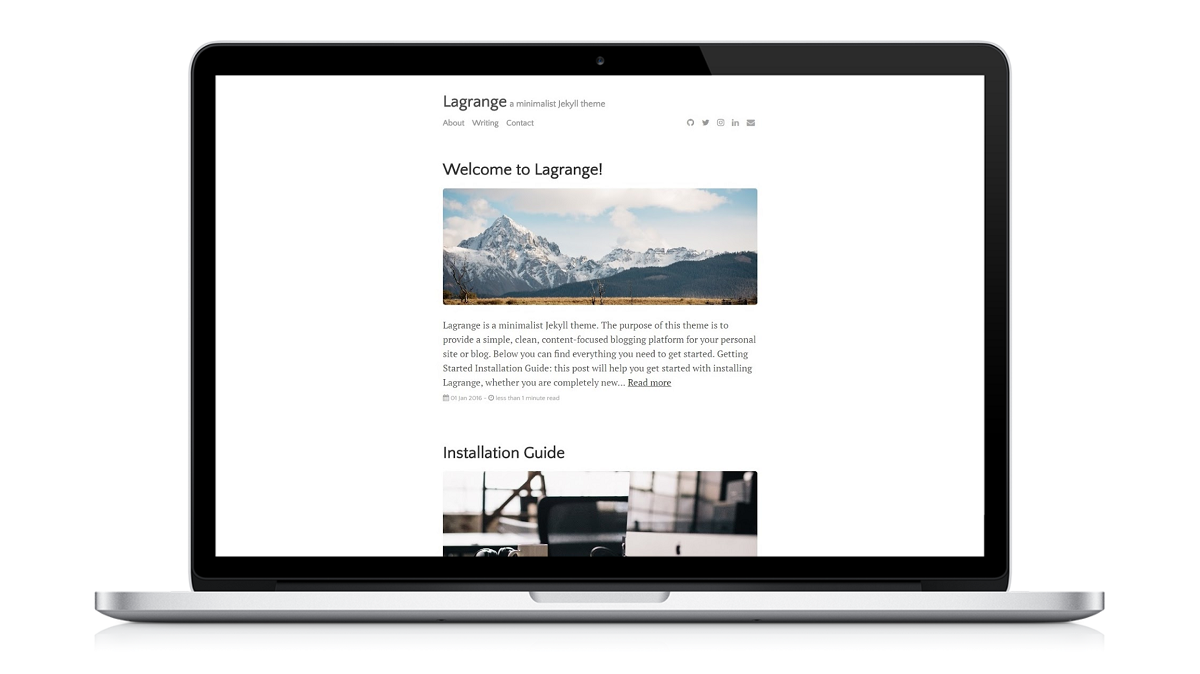
By the end of this guide, you will have a blog or personal website that looks something like this. It will be under a unique domain name, and you will have complete control over your site.
This guide will walk you through the process of creating your GitHub account, choosing a Jekyll theme, making changes to your Jekyll theme, and publishing blog posts. Having programming ability is not required for this guide.
Table of Contents
Create a GitHub Account
To get your Jekyll site hosted on GitHub Pages, you will need to create a GitHub account if you do not have one already. Navigate to GitHub and click on “Sign up” at the top right to create your account. The free pricing plan is more than enough for our purposes.
Install GitHub Desktop
GitHub Desktop allows you to interface with your GitHub repositories without having to use the command line. We will be using GitHub Desktop to import our Jekyll theme, make changes to the theme, and publish blog posts.
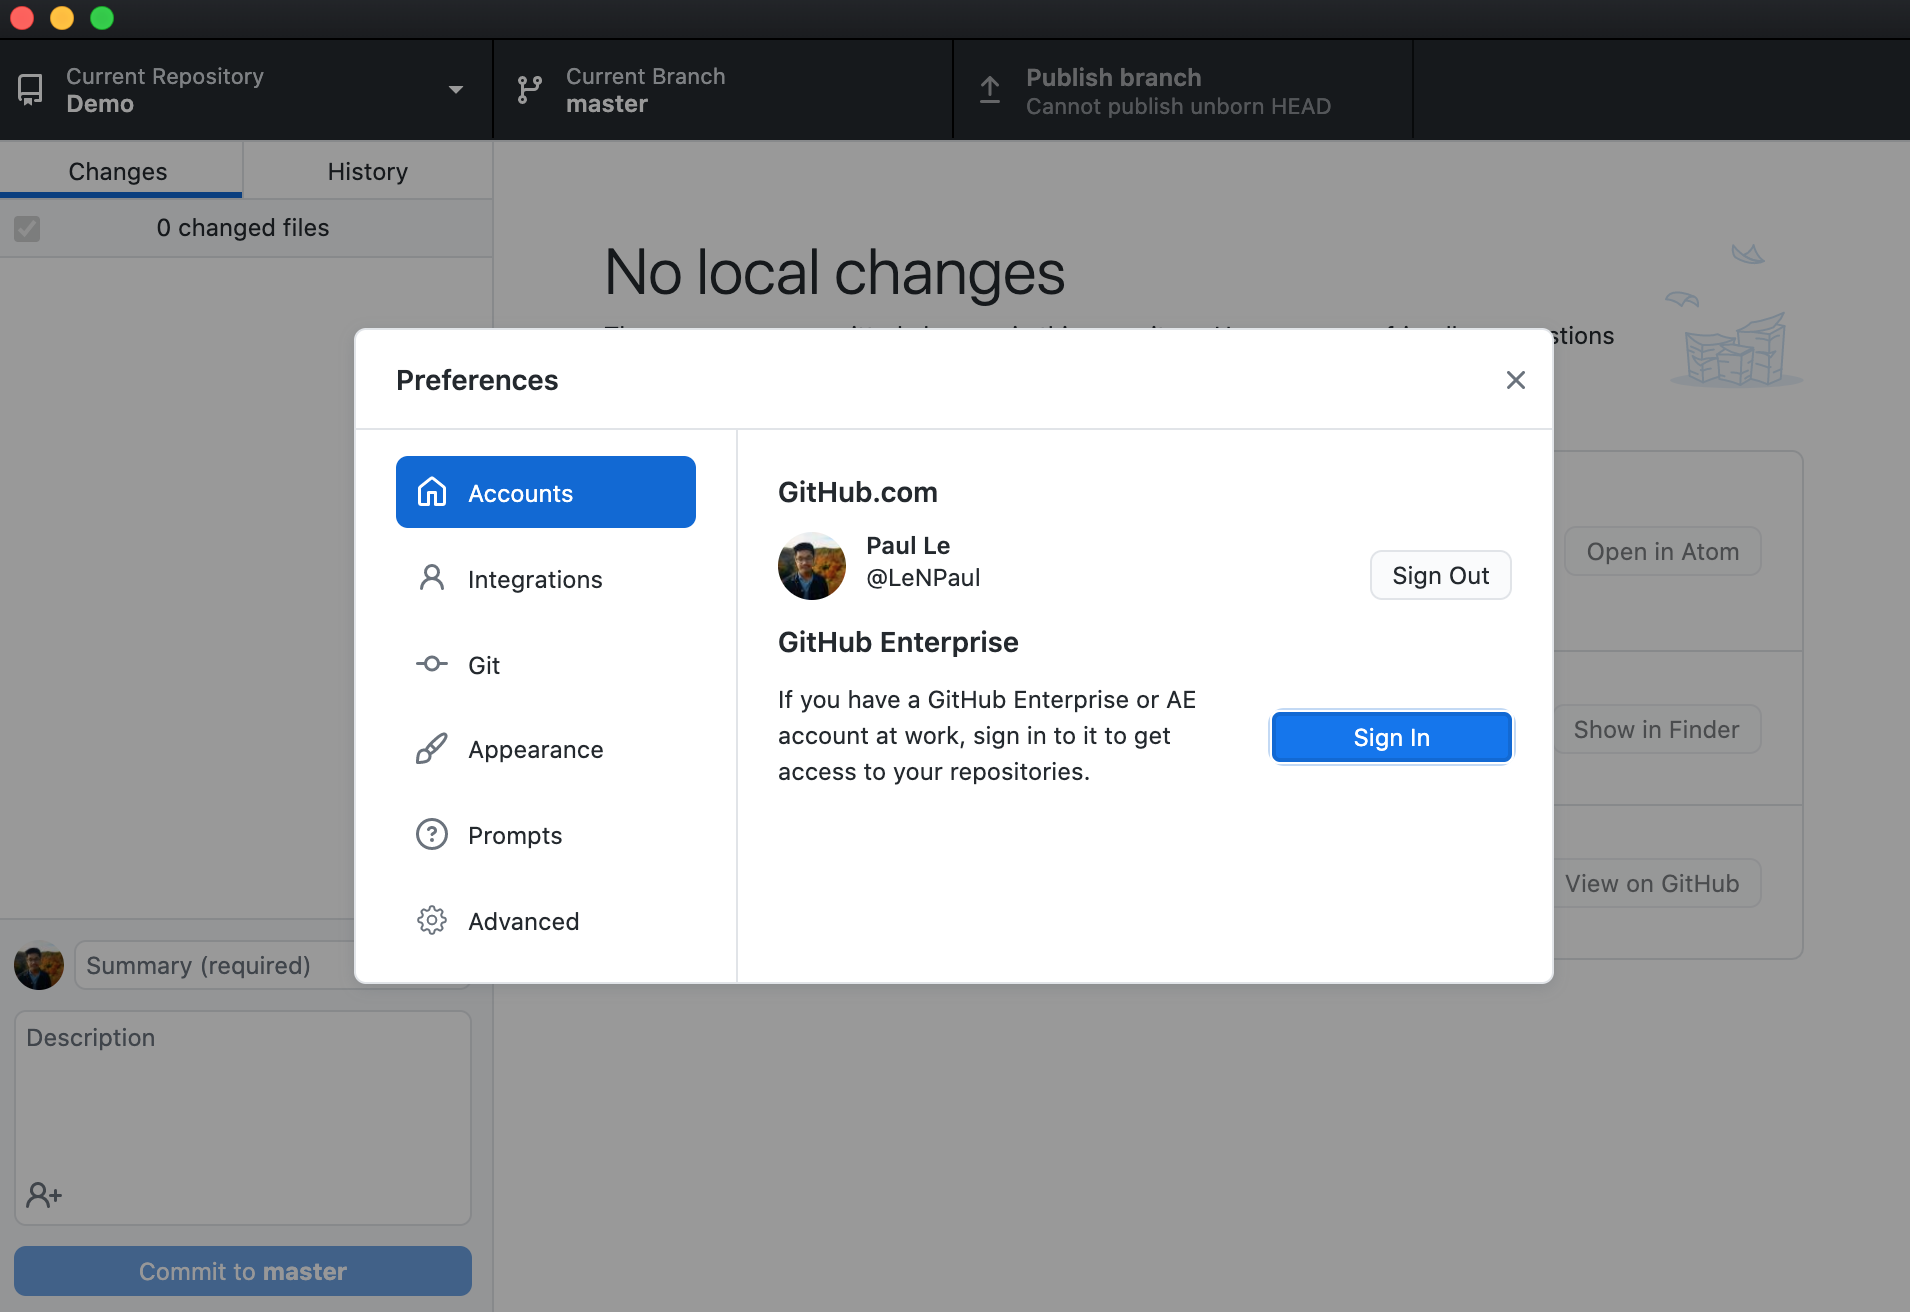
Once you have downloaded and installed GitHub Desktop, navigate to the “Preferences” screen and ensure that you are logged into your GitHub account.
Create a Repository on GitHub
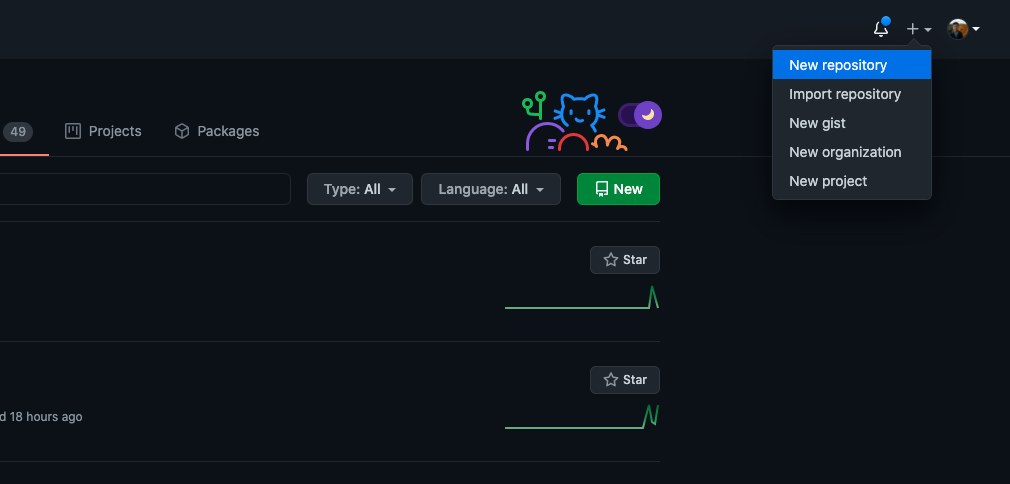
Create the repository that will contain your Jekyll site by navigating to this link or clicking on the dropdown menu at the top right of any page while logged into GitHub and clicking on “New repository”.
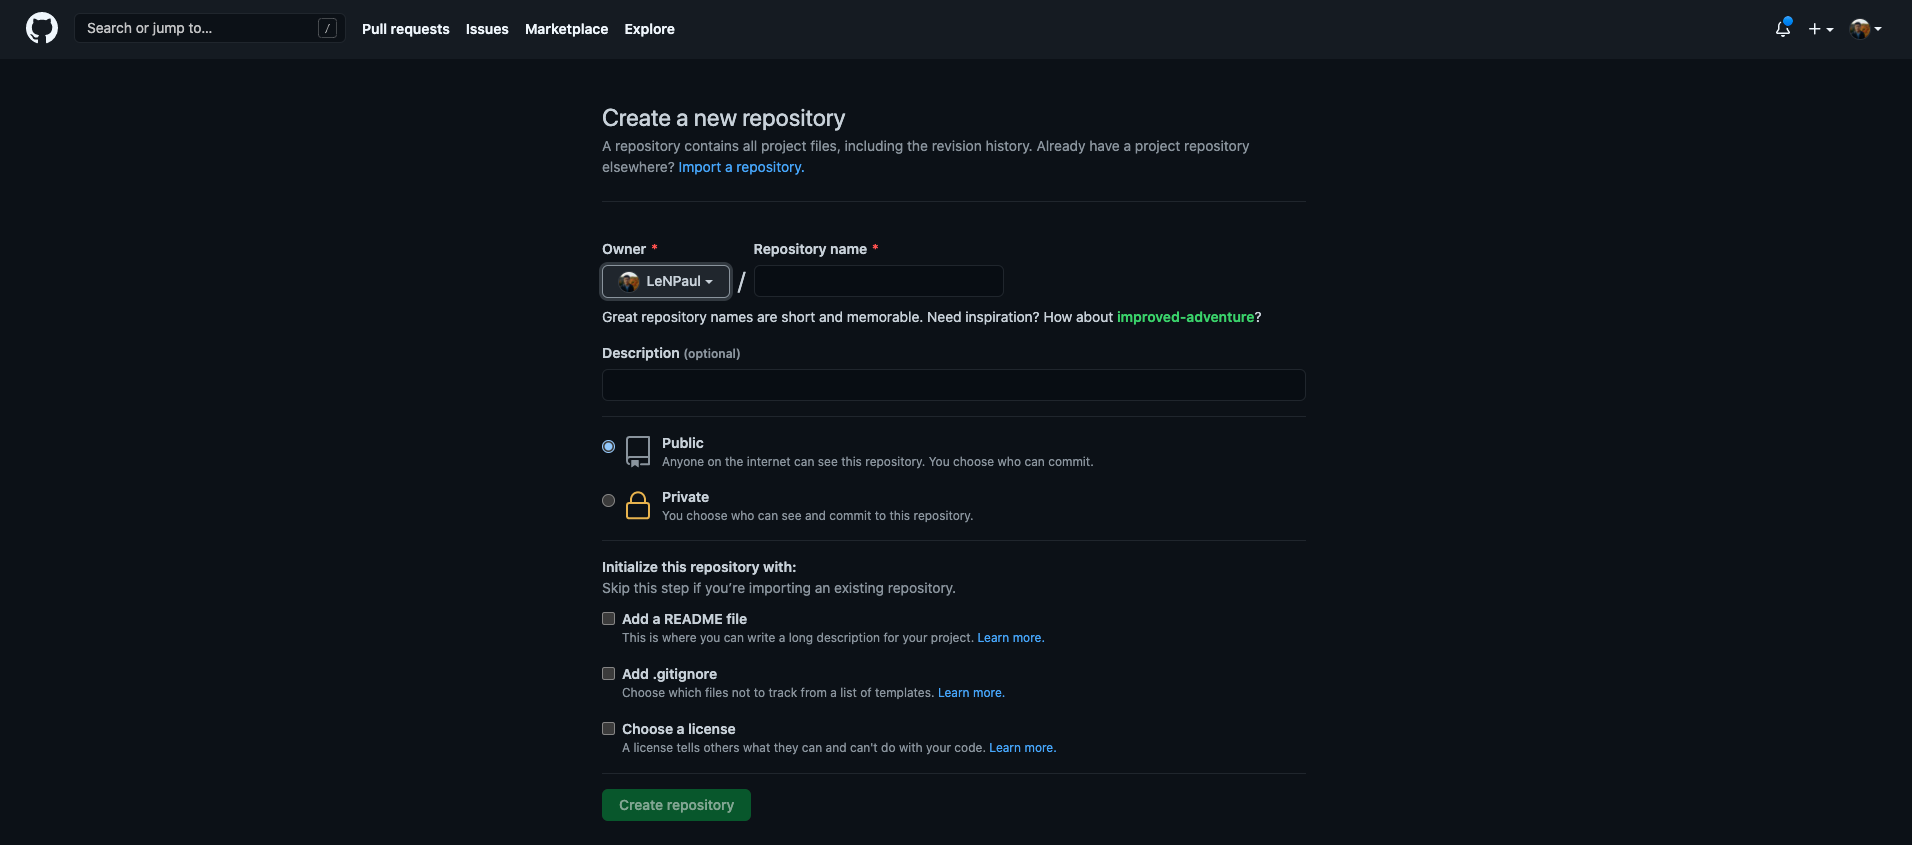
You will need to name your repository <username>.github.io, where <username> is your GitHub username. For example, since my GitHub username is lenpaul, I would name my repository lenpaul.github.io.
Ensure that your repository is public. All the checkboxes under “Initialize this repository with” should also be unchecked. Once created, your repository should be empty.
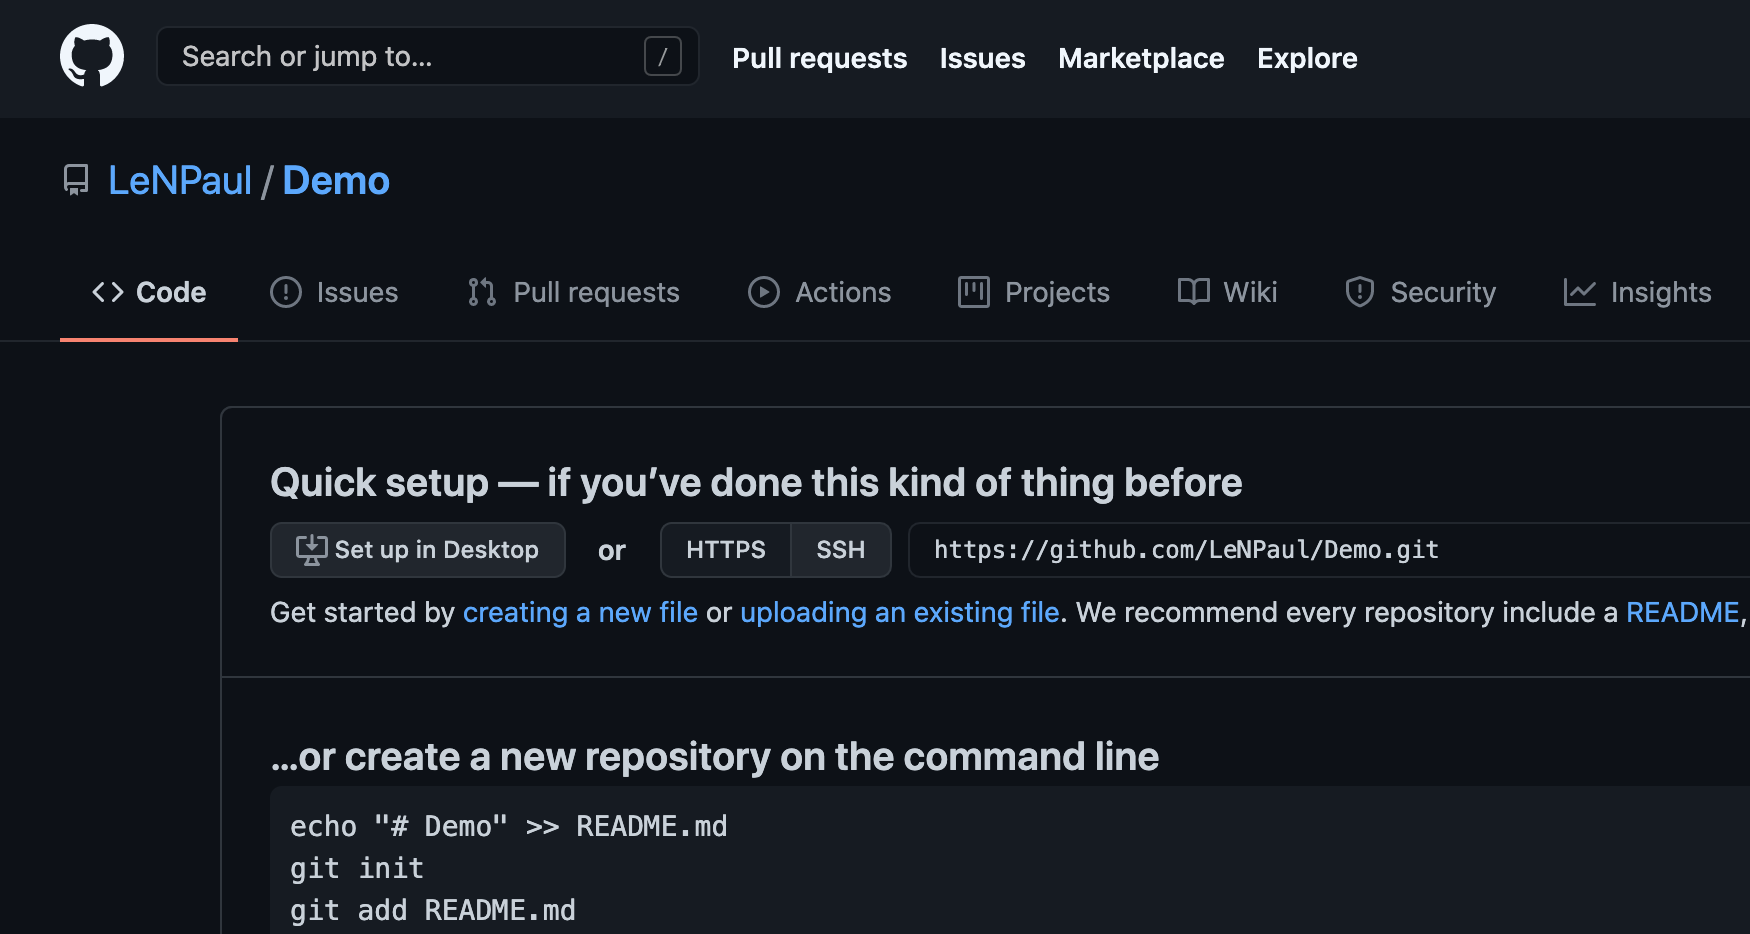
The next step is to set up your repository on your local computer. If your repository is empty, then you can do that by clicking on “Set up in Desktop” while in your repository.
If you end up with files in your repository, then you can set up your repository on your local computer by clicking on the green “Code” button and clicking “Open with GitHub Desktop”.
GitHub Desktop should automatically open on your computer with the following prompt. Choose a directory on your computer that you would like to use to store your repository and click “Clone”.

Find a Jekyll Theme
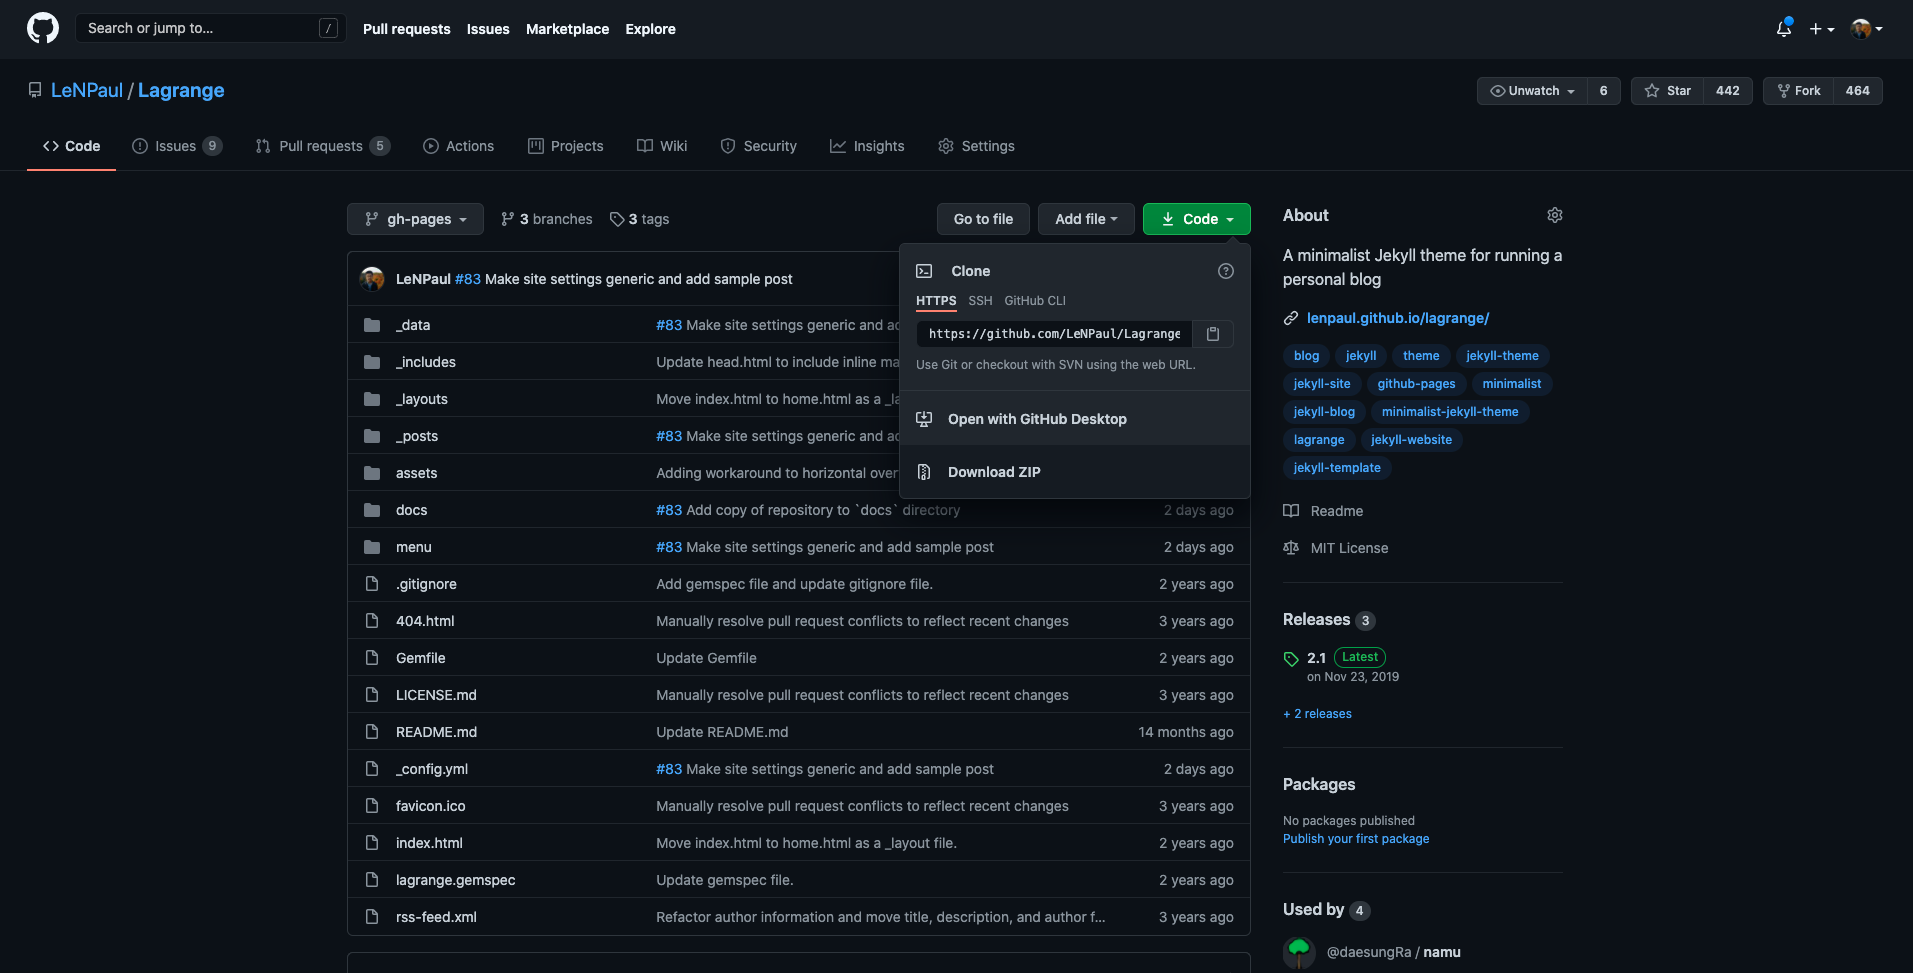
Jekyll has a massive community of Jekyll fanatics that create themes. There are plenty of themes that you can use for free. For this guide, we will be using Lagrange, my most popular Jekyll theme.
However, this guide will work the same for any Jekyll theme that is hosted on GitHub with a working demo. Usually, when you find a theme through one of the recommended Jekyll theme showcase sites, they will have links to the GitHub repository and a live demo of the Jekyll theme.
For example, Michael Rose of Made Mistakes has released several amazing Jekyll themes. As long as they have their own GitHub repository, and there is a live demo of the theme, this guide will work for that theme.
Import Your Jekyll Theme
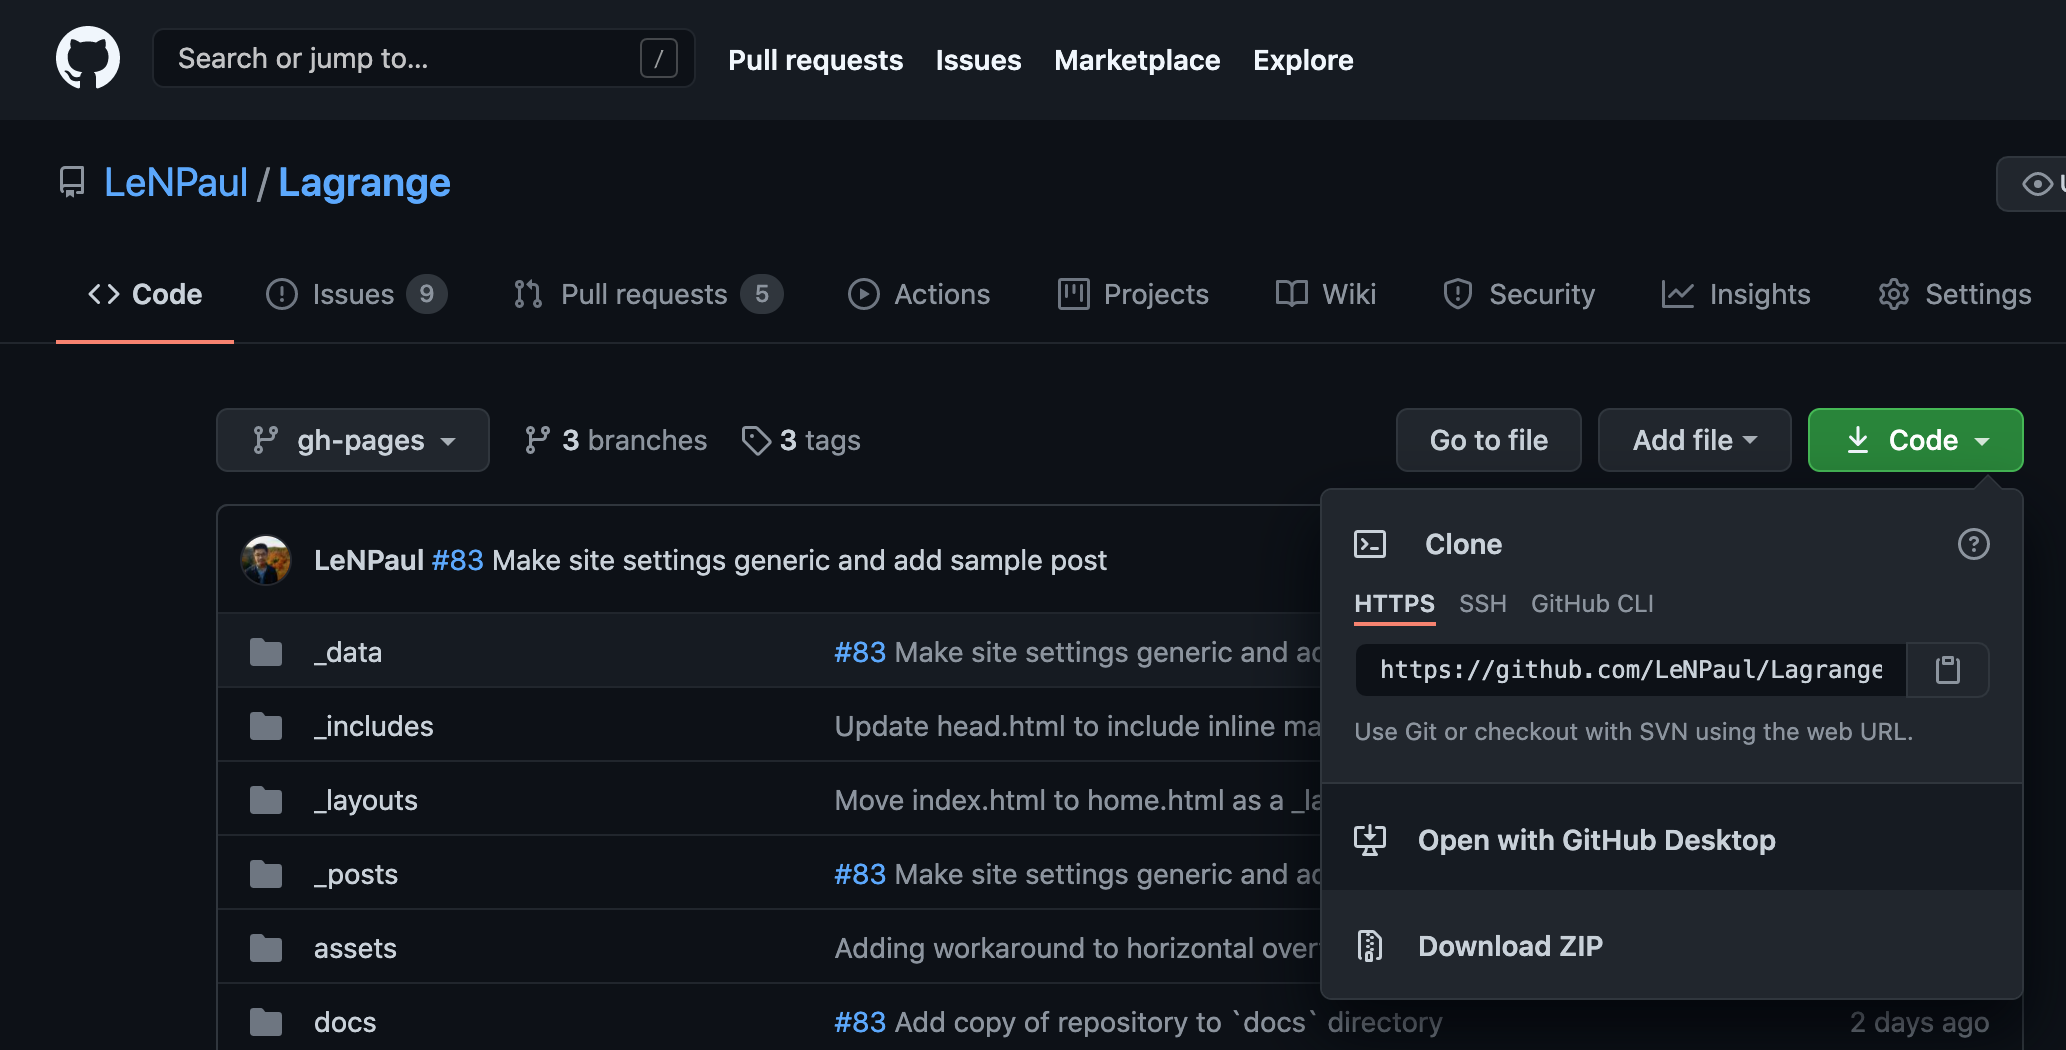
The Jekyll theme that you choose should have a GitHub repository that you can find and download. For this guide, you can find the GitHub repository for Lagrange here. Once you have found the GitHub repository, you will want to download a ZIP of the repository by clicking on the green “Code” button at the top right of the repository and clicking on “Download ZIP”.
Once you have downloaded your repository ZIP, you can go ahead and unzip that file to get your Jekyll site files. They should look something like the following.
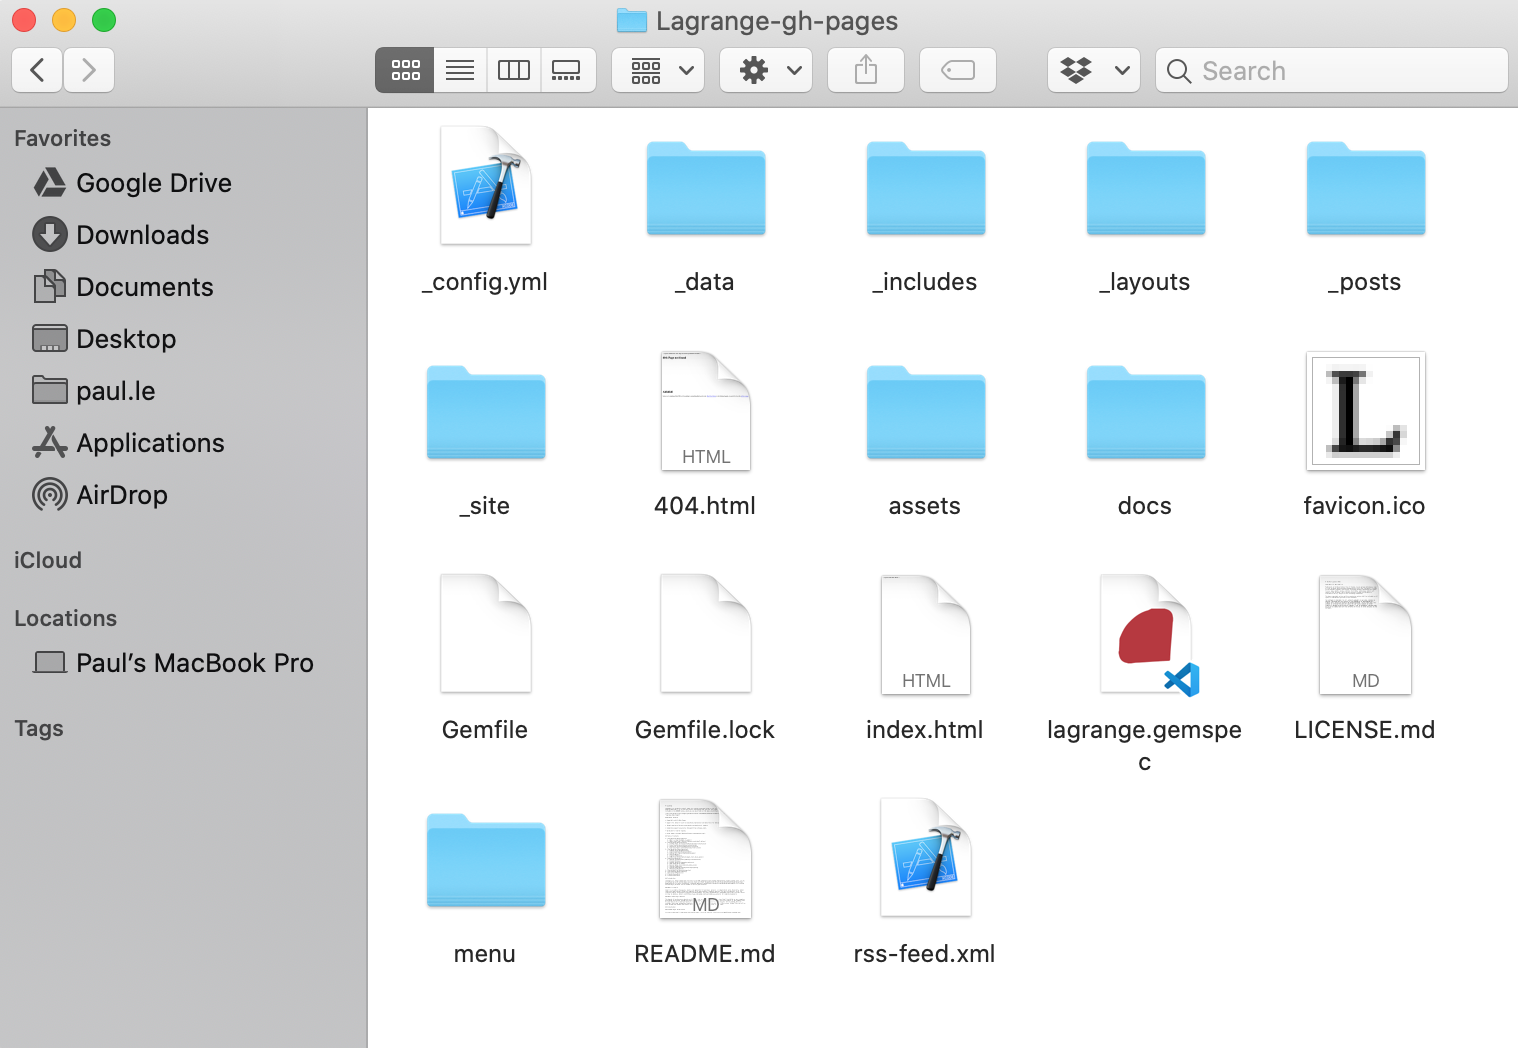
Copy and paste these files to the directory that you had created on your local computer with GitHub Desktop when you created your repository. When you view your repository on GitHub Desktop, it should look something like the following.
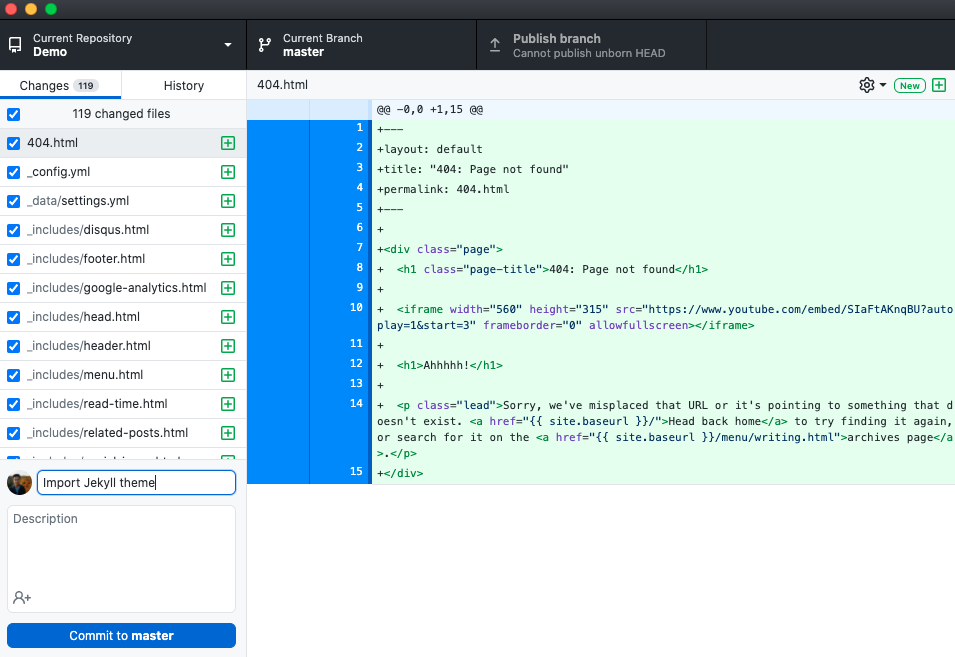
In the bottom left, add a summary of your commit and click the “Commit to master” button. You may also need to click on “Publish Branch” after.
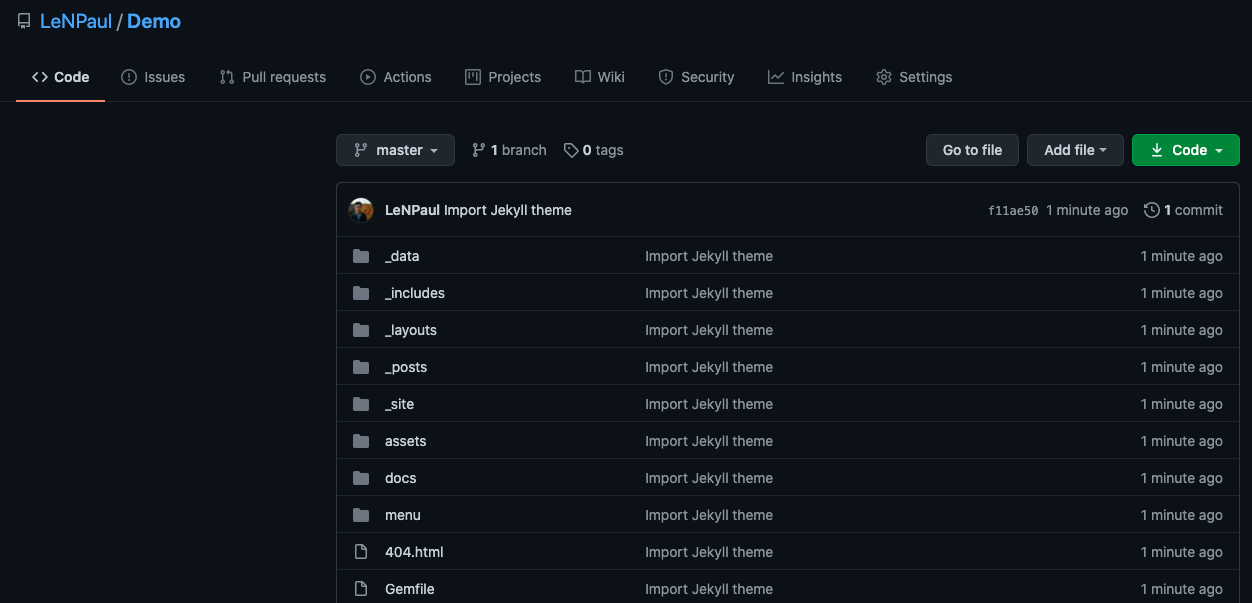
After a few seconds, your repository on GitHub should no longer be empty and should have the Jekyll theme files that we had imported.
Enable GitHub Pages
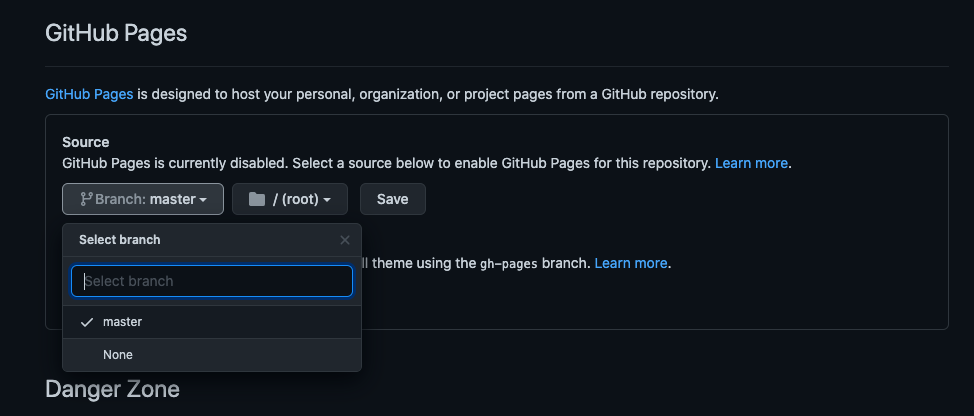
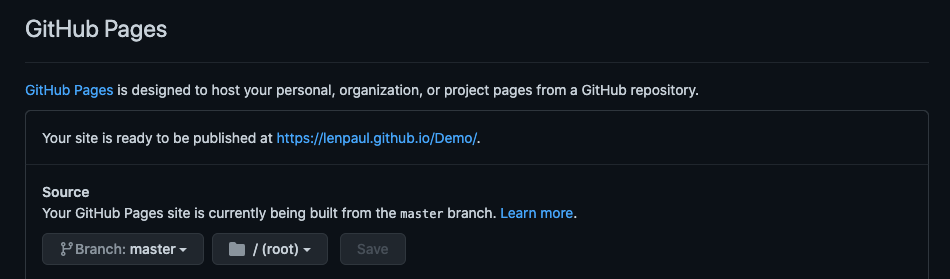
Now that you have your Jekyll theme imported to your repository, you will need to enable GitHub Pages to get your site running. Navigate to the settings page for your repository, and scroll down to the “GitHub Pages” section. Under “Source”, select the “master” branch, ensure that “/(root)” is selected, and click “Save”.
Once you refresh the page, you should see that your site is ready to be published under the “GitHub Pages” section. You may need to wait a few minutes before your site is available, after which when you click on the URL provided, you will see your site in action.
Personalize Your Site
You should now have a site running that is powered by Jekyll and GitHub Pages. The next step is to begin personalizing your site.
By default, your Jekyll theme will have a _config.yml file where you can change general configurations such as the title and description of your site. You can change this by navigating to that file in your GitHub repository and clicking on the pencil icon, which will allow you to edit the _config.yml file.
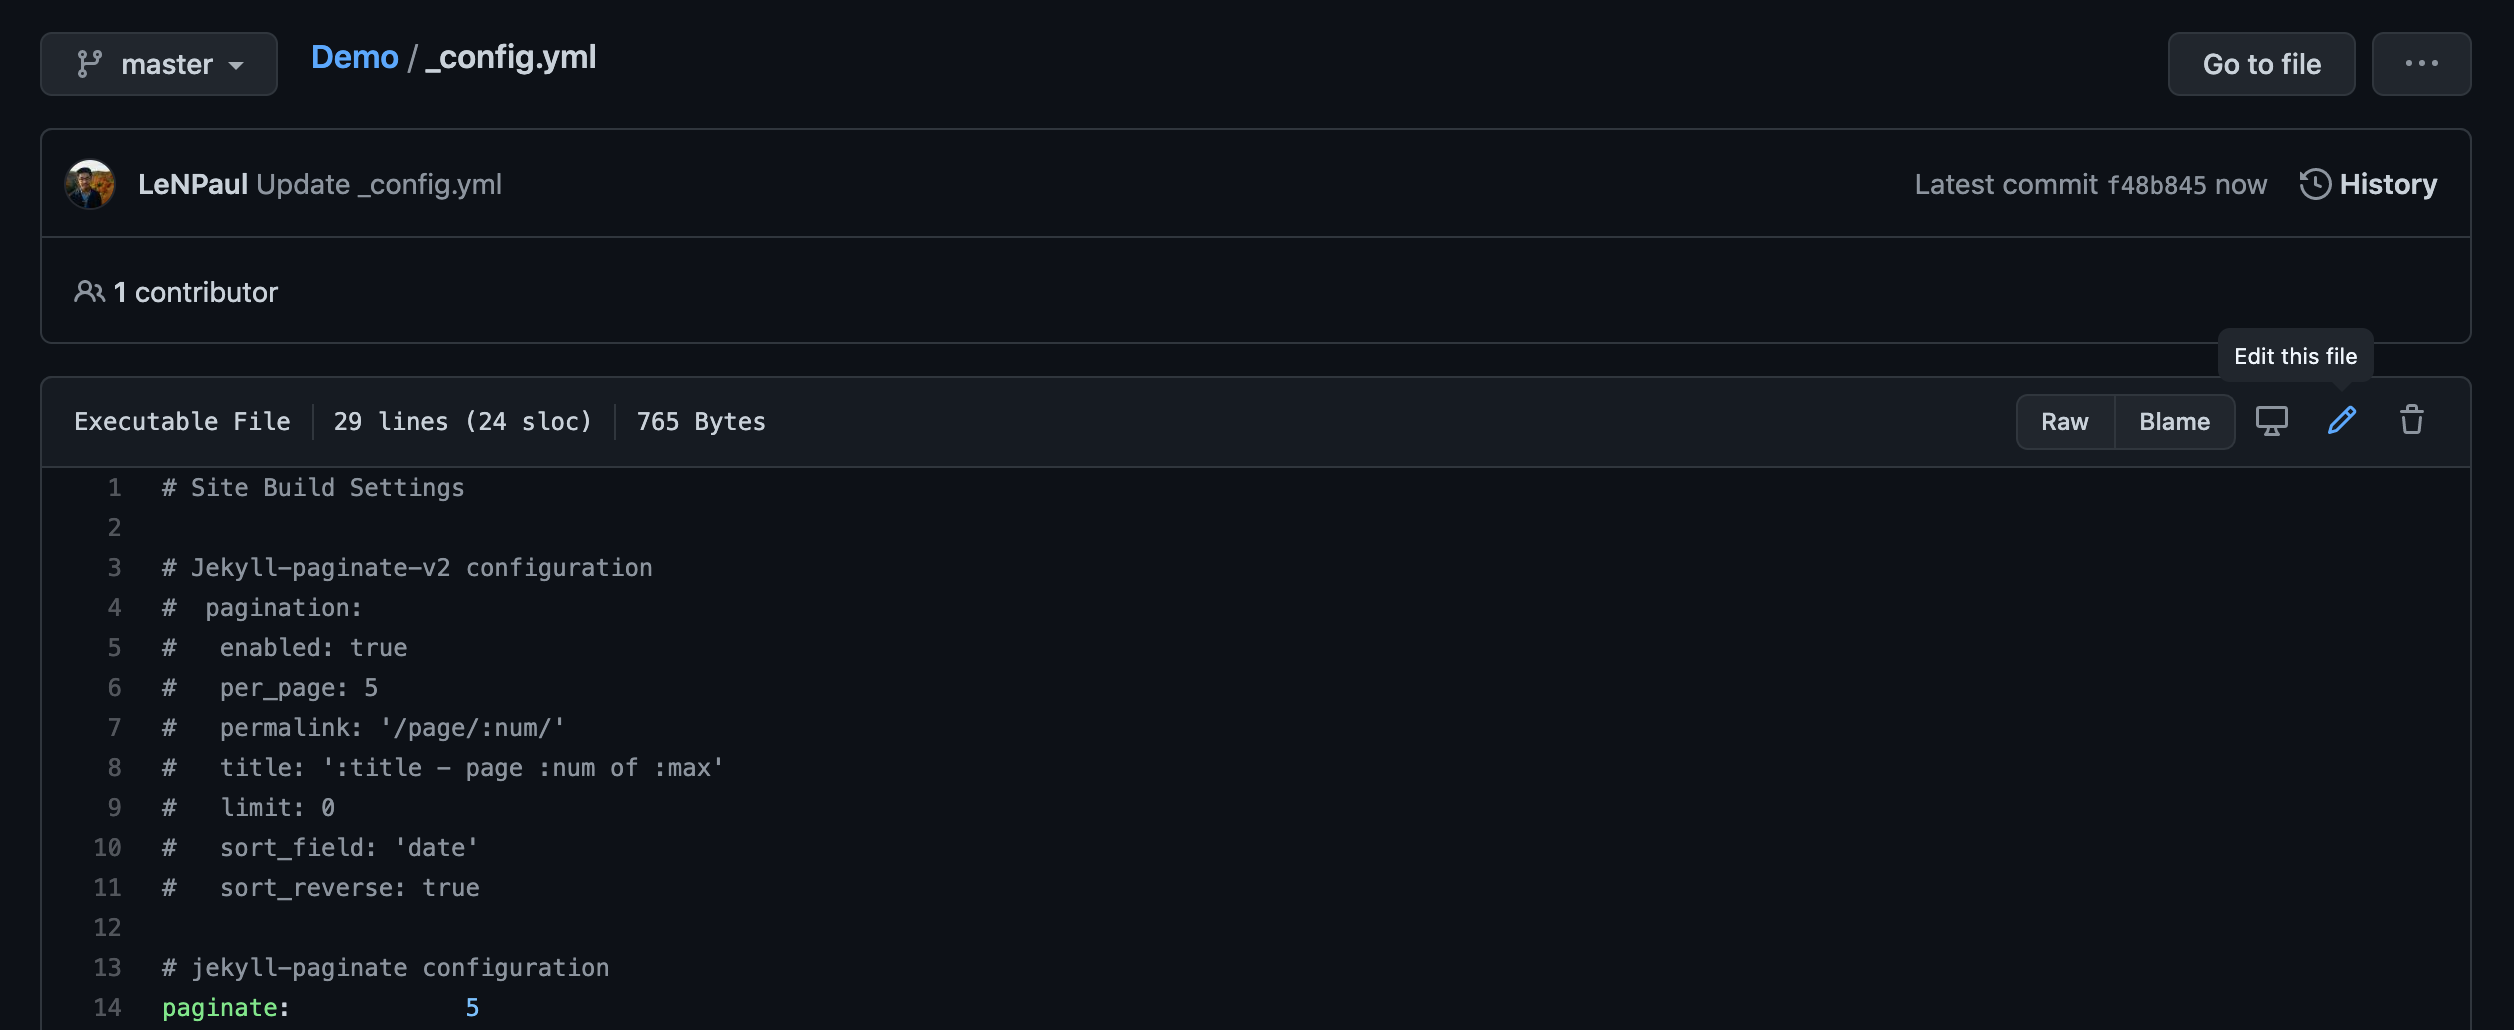
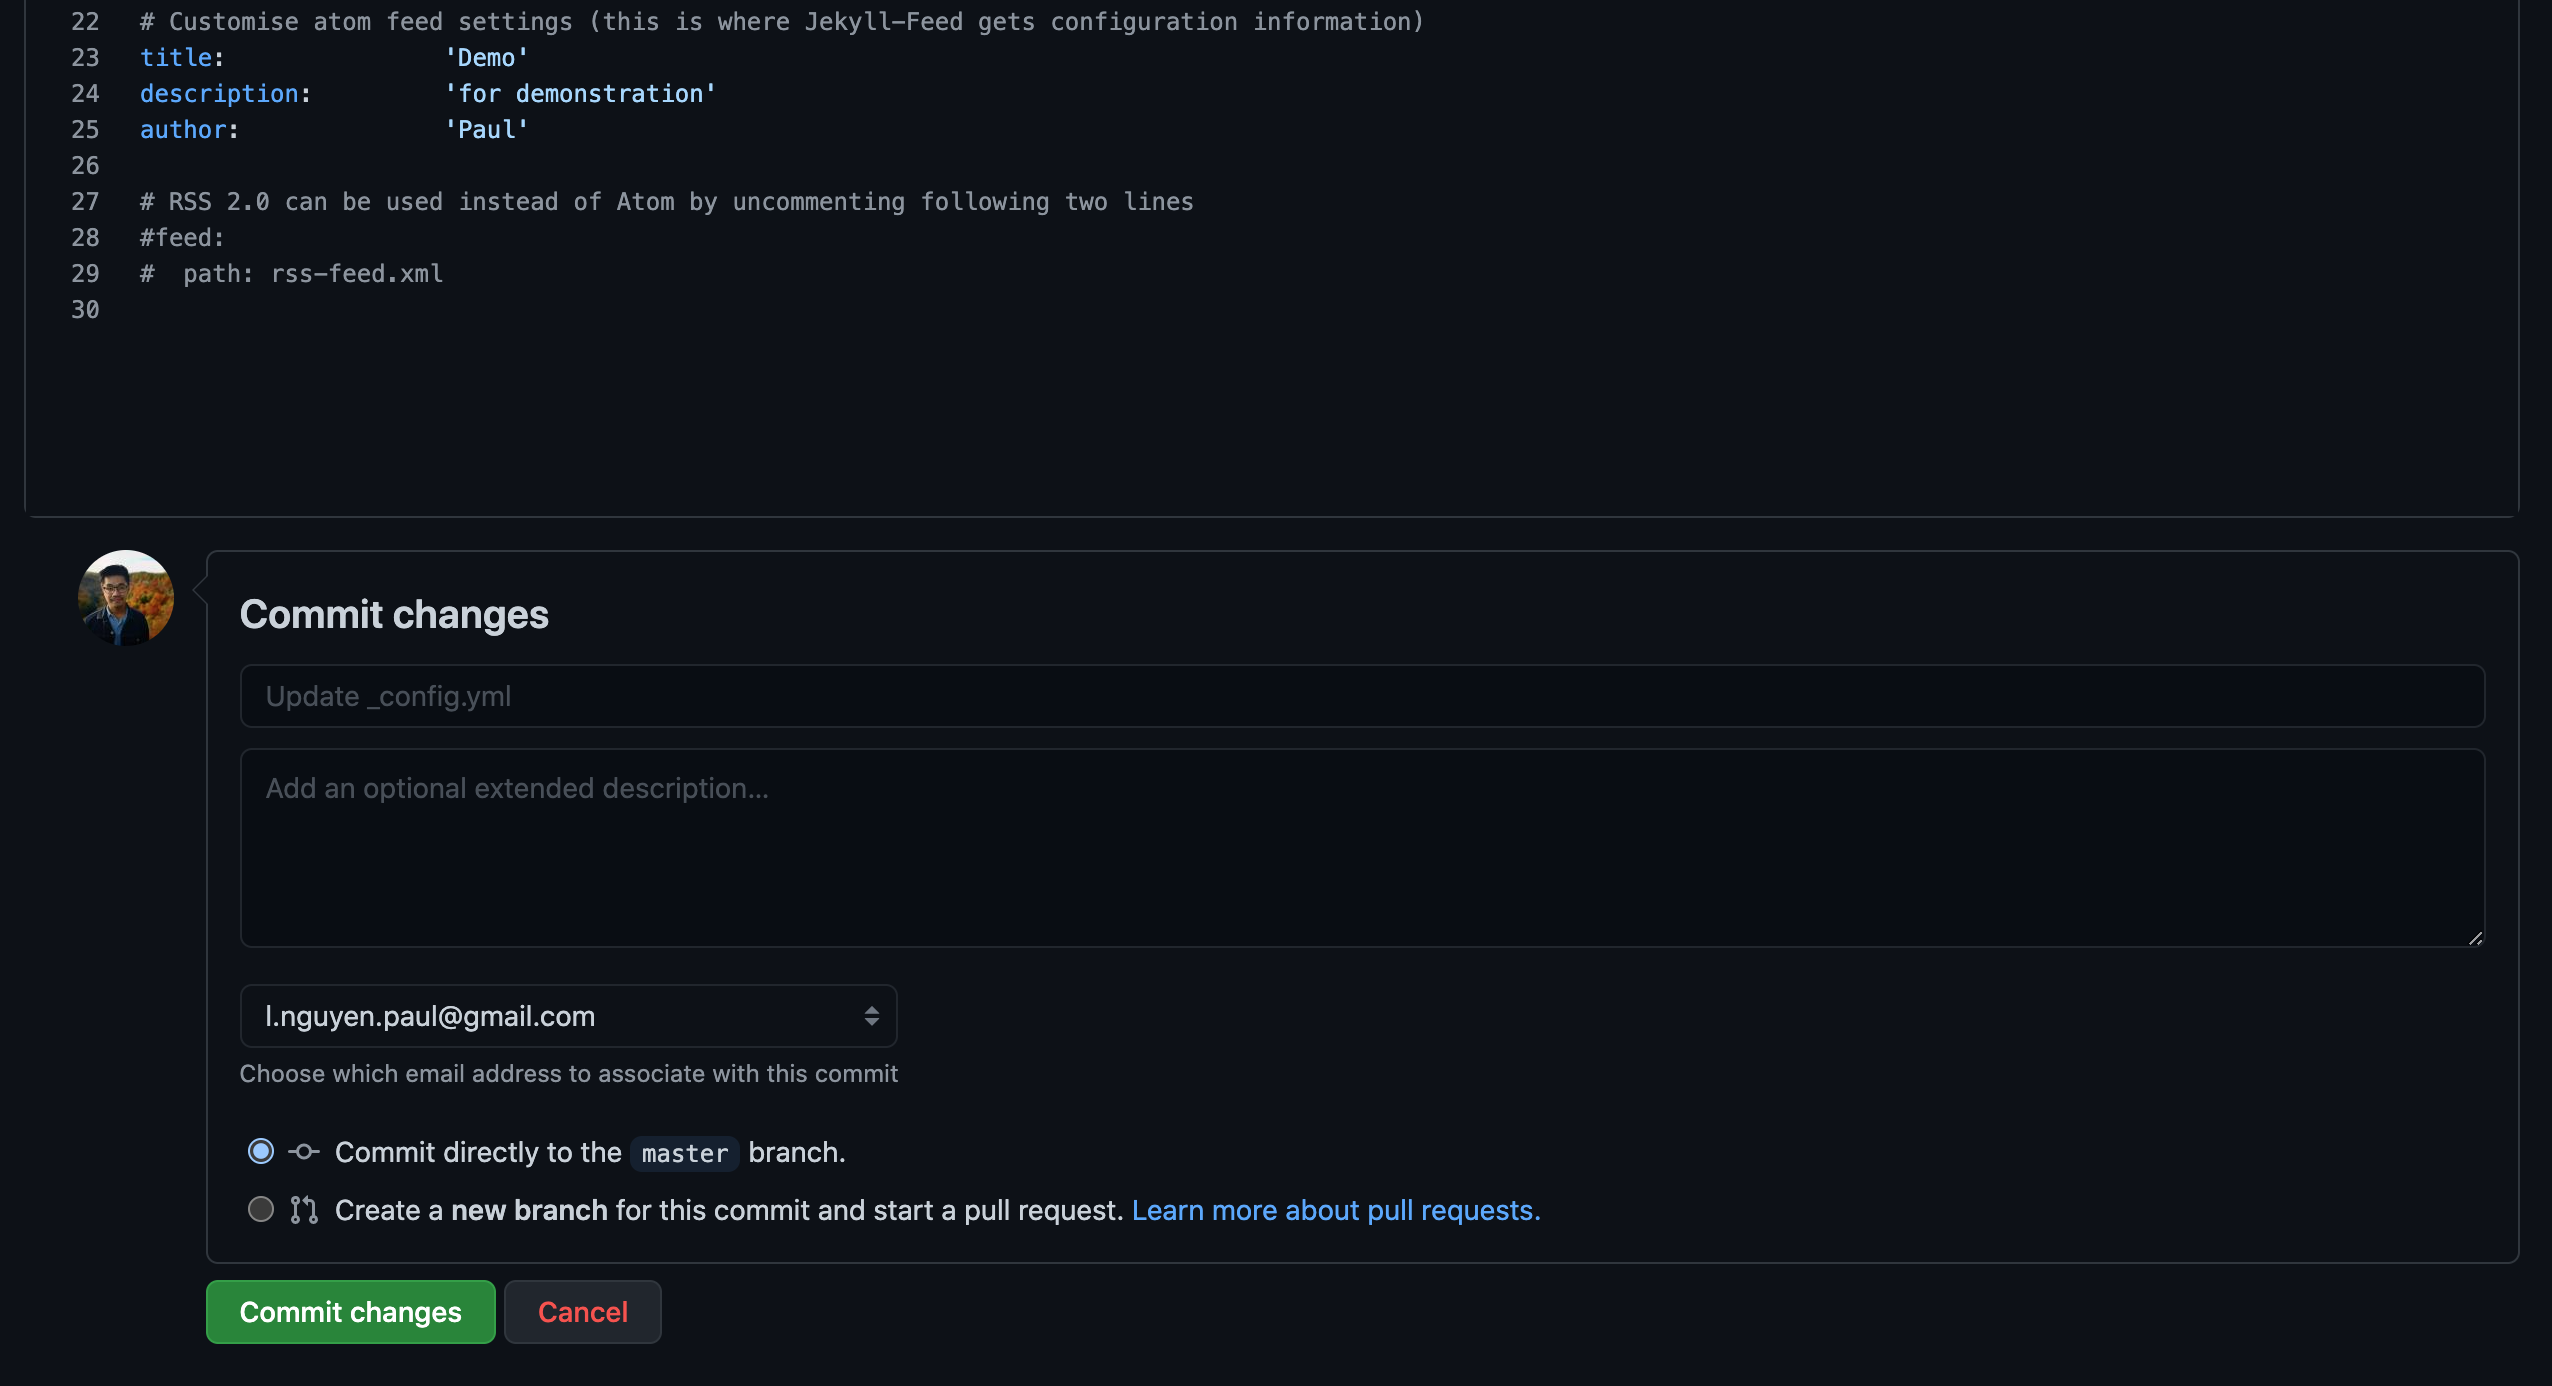
Change some configuration parameters such as the title and the description, and commit your changes. Your changes should take effect after a few minutes on your site.
Publish Blog Posts
Although you can just as easily add blog posts through GitHub using the browser as we did above, we will go through the steps of publishing blog posts using GitHub Desktop.
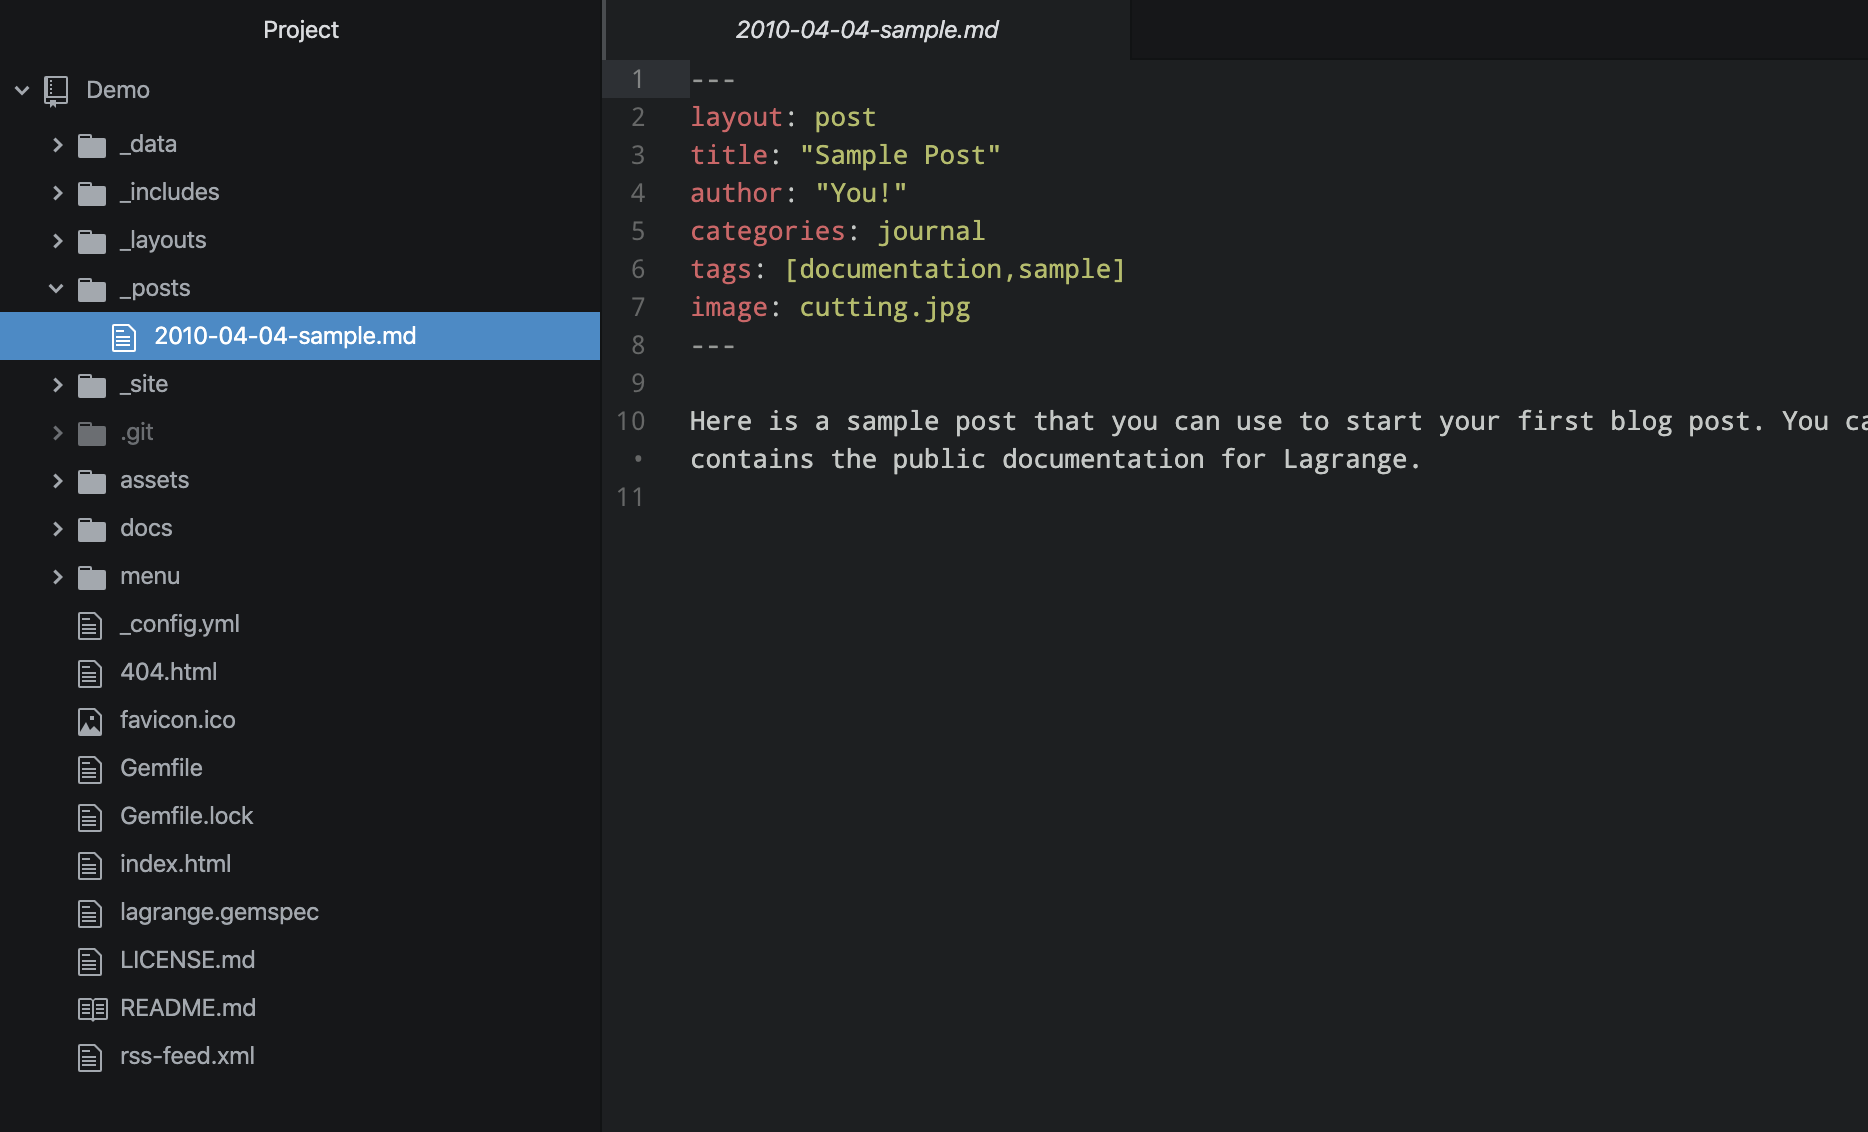
Using your text editor of choice (I am using Atom here), navigate to your Jekyll repository. There will be a directory called _posts. This is where all of your blog posts are kept. Usually, there will be a few sample posts that you can use as a starting point.
Open up one of the sample posts, add your content, and save your changes.
Once you have your first blog post saved, open up GitHub Desktop and navigate to your Jekyll repository. It should show you what files you had just changed, and what was changed in these files.
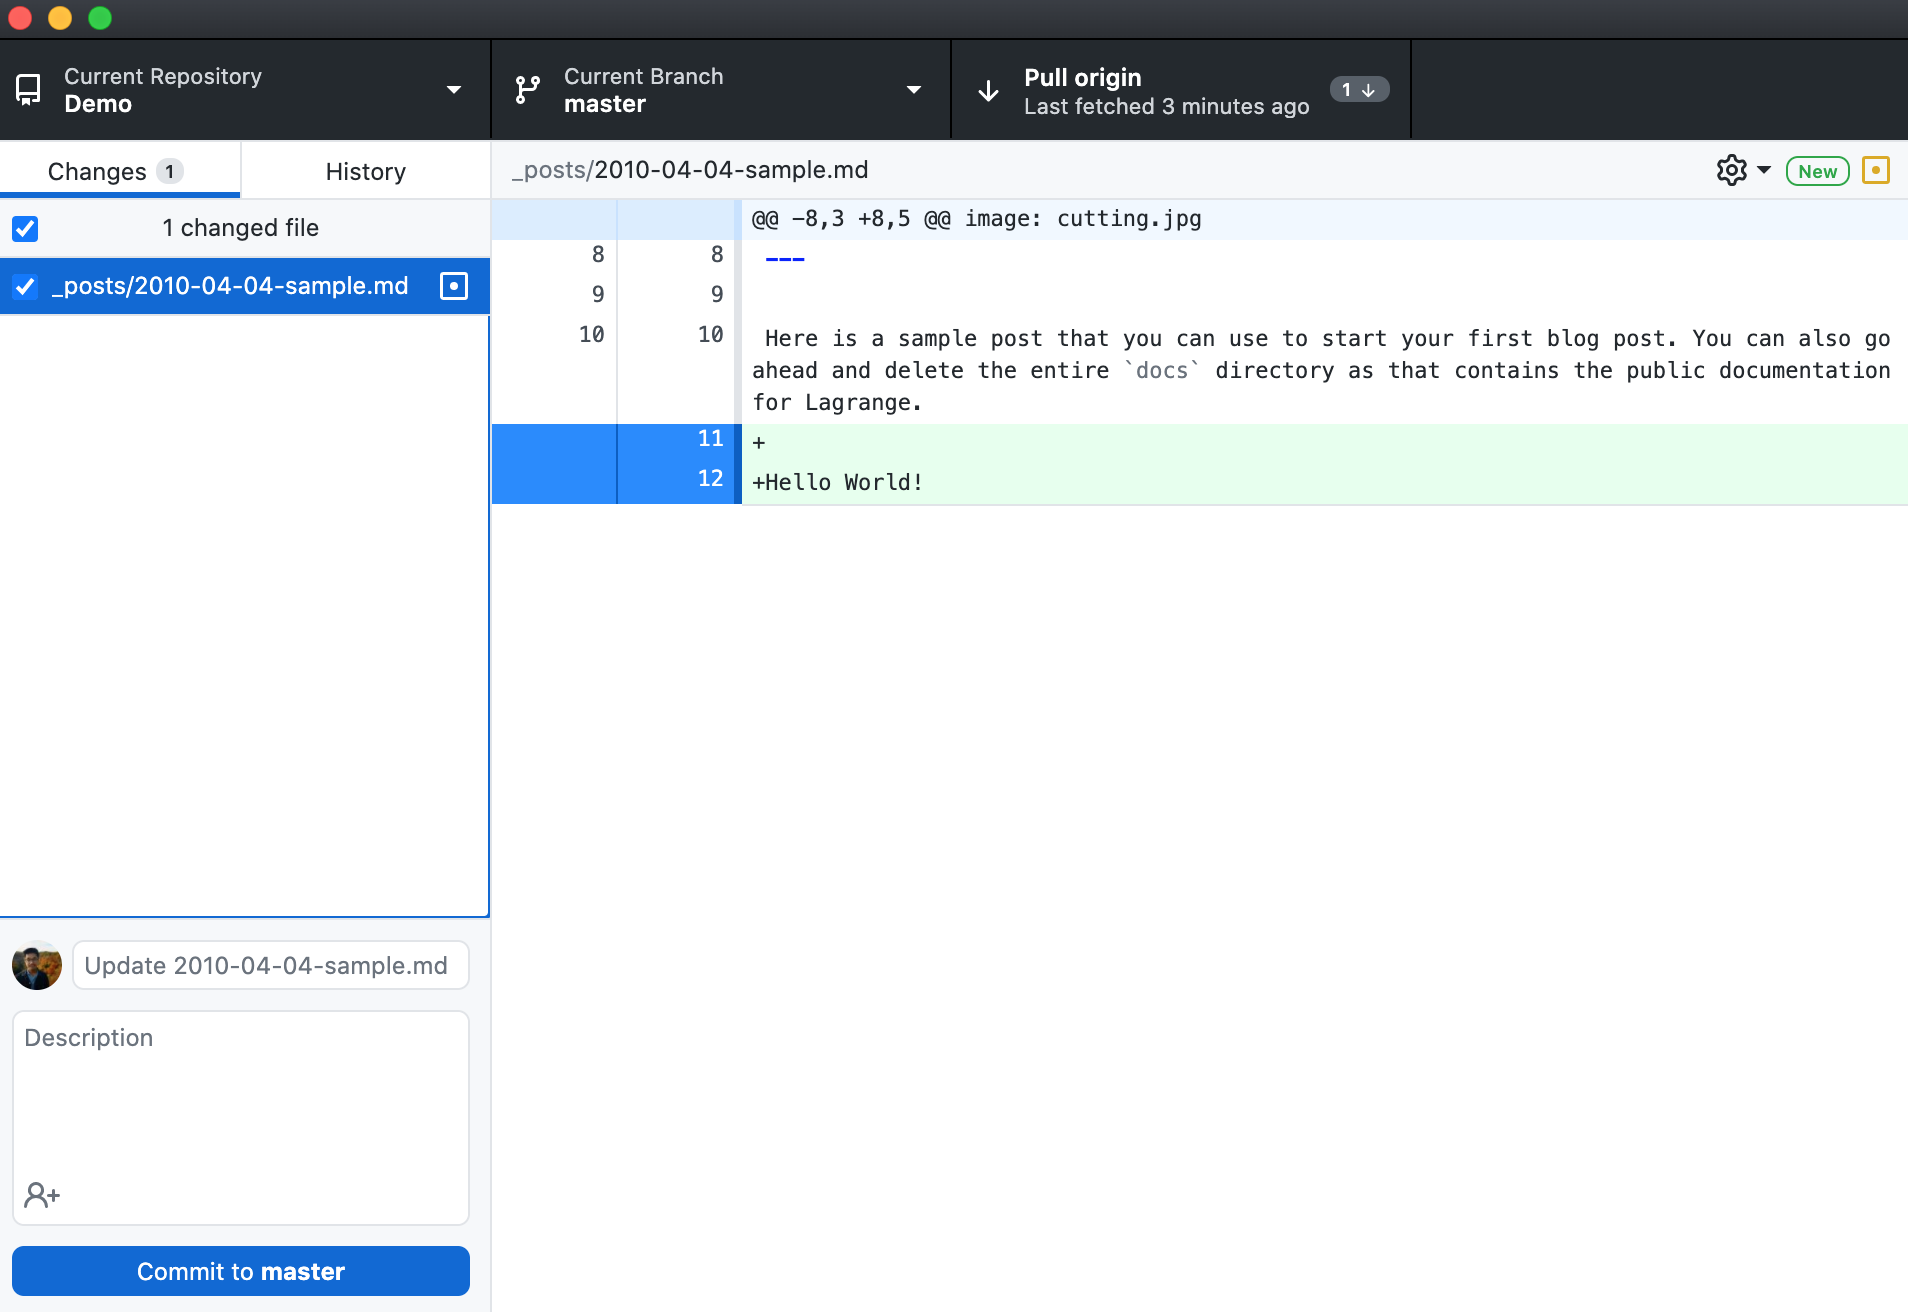
Commit your changes, and push those changes to your GitHub repository by clicking on “Push origin”.
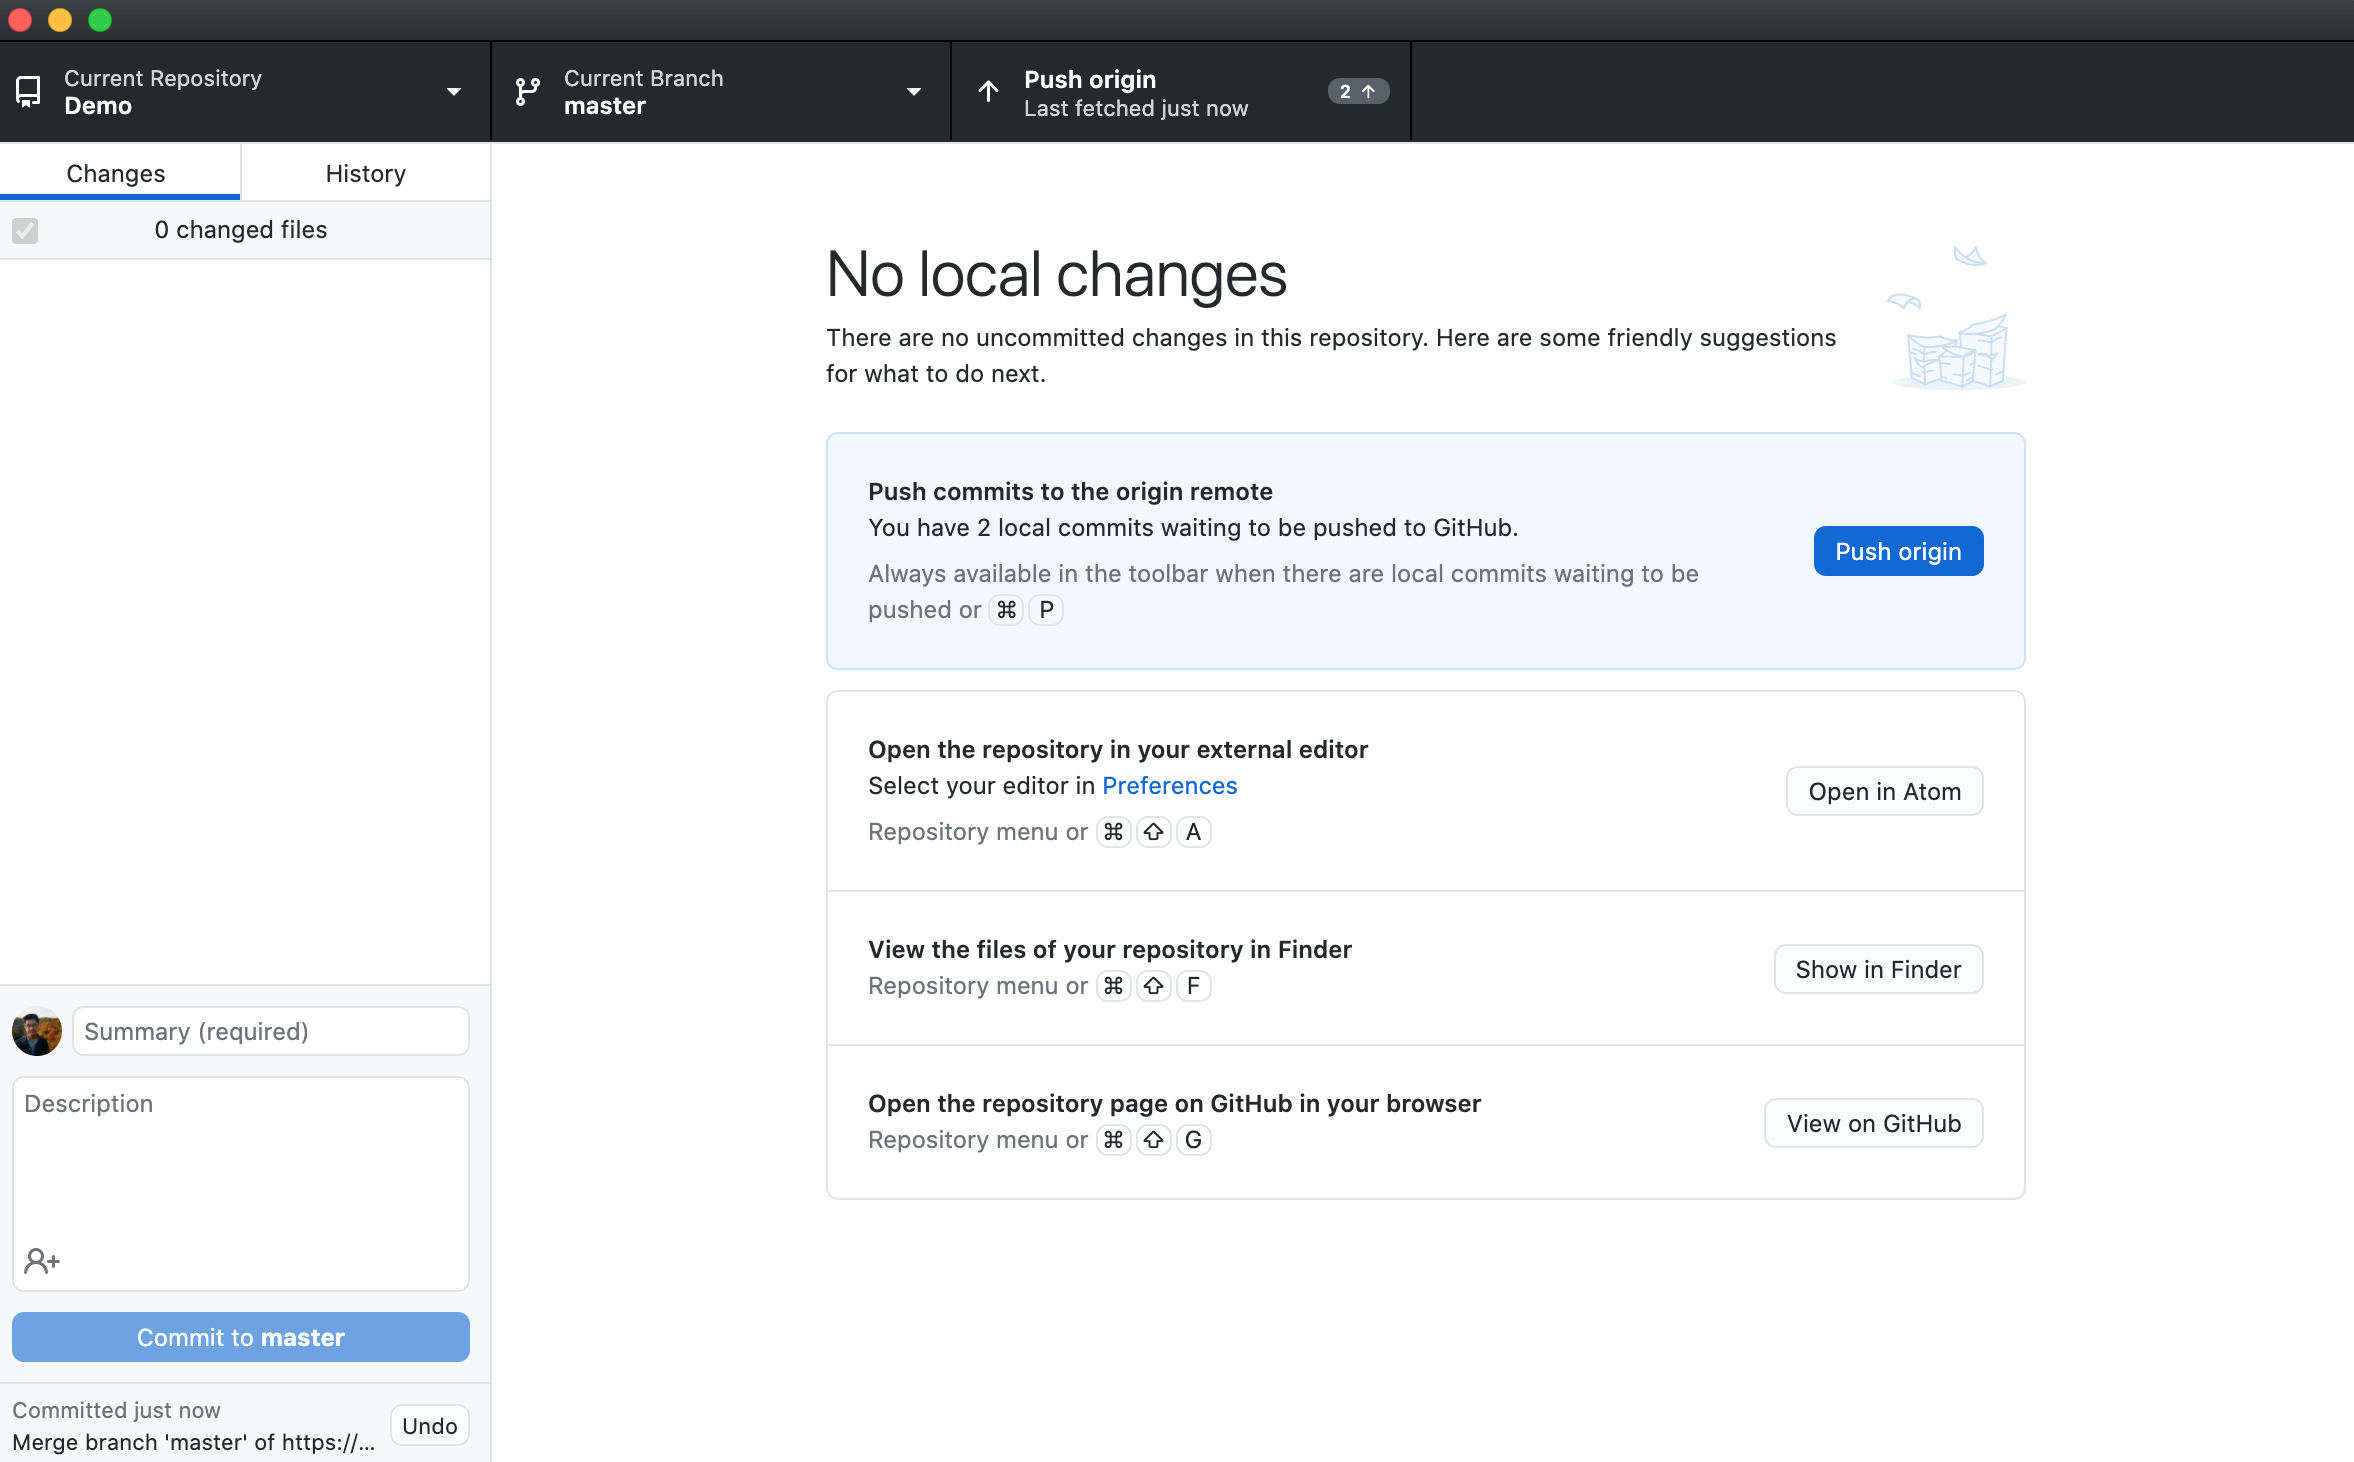
After a few minutes, your blog post should show up on your site.
Conclusion
Congratulations, you have started a blog or personal website using Jekyll and GitHub Pages! For now, we are sticking to updating some configurations for your Jekyll site and publishing blog posts.
FAQ
My site URL looks different from yours.
If you name your repository <username>.github.io, then your URL will be https://<username>.github.io. If you name your repository anything else, then your URL will be https://<username>.github.io/<repository name>.
The Jekyll theme I like doesn’t have a GitHub repository.
Jekyll themes that you find from any of the sites linked on the Jekyll documentation site should have a GitHub repository referenced. If you are unable to find one, it may not be compatible with GitHub Pages.
Do I need to learn how to program to work with Jekyll and GitHub Pages?
If you are content with using your Jekyll theme as-is, you do not need to learn how to program. Even making basic changes to your theme does not require advanced programming ability. You can get by just fine with the steps outlined in this guide, and you will be able to customize pages and publish blog posts using any Jekyll theme that you like.